Android UI Components
1. UI 개요
- 안드로이드의 어플리케이션에 있는 모든 UI 요소들은 View와 ViewGroup 객체들로 구성이 되어 있다.
- View는 화면의 사각형 영역에 있는 컨텐츠나 화면 레이아웃을 담당한다.
- ViewGroup은 화면 Layout을 말한다. 즉, 각각의 View들을 합쳐서 전체 구조(화면 전체 Layout)을 그려낸다.

2. Layout
2.1 개요
- Activity나 Widget의 UI를 Layout이라고 한다.
- Layout을 표현하는 방법은 두가지가 있다.
- XML을 이용하여 화면을 구성하는 방법(정적인 레이아웃)
<?xml version="1.0"encoding="utf-8"?><LinearLayout xmlns:android="http://schemas.android.com/apk/res/android"android:orientation="vertical"android:layout_width="fill_parent"android:layout_height="fill_parent"><TextViewandroid:layout_width="fill_parent"android:layout_height="wrap_content"android:text="@string/hello"/></LinearLayout> - 자바 코드를 통해 화면을 구성하는 방법
publicclassHelloAndroidextendsActivity {/** Called when the activity is first created. */@OverridepublicvoidonCreate(Bundle savedInstanceState) {super.onCreate(savedInstanceState);LinearLayout root =newLinearLayout(this);LinearLayout.LayoutParams params =newLinearLayout.LayoutParams(ViewGroup.LayoutParams.FILL_PARENT, ViewGroup.LayoutParams.FILL_PARENT,0.0F);root.setLayoutParams(params);root.setOrientation(LinearLayout.VERTICAL);TextView tv =newTextView(this);tv.setText(R.string.hello);LinearLayout.LayoutParams tvParams =newLinearLayout.LayoutParams(ViewGroup.LayoutParams.WRAP_CONTENT, ViewGroup.LayoutParams.WRAP_CONTENT,0.0F);tv.setLayoutParams(tvParams);root.addView(tv);setContentView(root);}} - Custom View를 동적 레이아웃으로 생성하는 방법
- inflater 사용 : xml파일을 ViewGroup으로 묶어주는 것.
일반적인 xml 파일에 정적으로 생성을 해 둔 뒤, 자바 코드 상에서 추가로 작성하여 동적으로 변형시킬 수 있다.
- inflater 사용 : xml파일을 ViewGroup으로 묶어주는 것.
- XML을 이용하여 화면을 구성하는 방법(정적인 레이아웃)
Layout을 inflate 하는 예제코드
//mytext.xml<?xml version="1.0" encoding="utf-8"?><LinearLayout xmlns:android="http://schemas.android.com/apk/res/android" android:orientation="horizontal" android:layout_width="fill_parent" android:layout_height="fill_parent" android:id="@+android:id/testlayout1" android:gravity="center_vertical|center_horizontal" > <ProgressBar android:id="@+android:id/testtext1" android:layout_width="30dip" android:layout_height="30dip" /> android:id="@+id/testtext" android:layout_width="80dip" android:layout_height="30dip" android:paddingLeft="3dip" android:text="로드 중 ..." /></LinearLayout>//MainActivity.javapublic LinearLayout mTestLayout; @Override public void onCreate(Bundle savedInstanceState) { super.onCreate(savedInstanceState); setContentView(R.layout.main); .... mTestLayout = (LinearLayout) View.inflate(this, R.layout.mytext, null); mTestLayout.setVisibility(View.INVISIBLE); mAdapter = new ArrayAdapter<String> (this, android.R.layout.simple_list_item_1, Items); mListView = (ListView) findViewById(R.id.list); mListView.addFooterView(mTestLayout); mListView.setAdapter(mAdapter); ... } |


- XML로 Layout을 구성하면 안드로이드 프로젝트의 res/layout/ 폴더에 저장해야된다.
- XML Resource를 Load할 경우
- Activity의 onCreate() 콜백 메소드에서 setContentView()를 통하여 xml파일의 Layout을 이 Activity에 적용한다.
publicvoidonCreate(Bundle savedInstanceState) {super.onCreate(savedInstanceState);setContentView(R.layout.main_layout);}
- Activity의 onCreate() 콜백 메소드에서 setContentView()를 통하여 xml파일의 Layout을 이 Activity에 적용한다.
2.2 속성
- id : View를 칭하는 이름을 정의한다. 코드나 XML 문서에서 View를 참조할 때 ID를 사용한다.
- @ + id/ ID
- @ : id를 리소스(R.java)에 정의하거나 참조한다는 뜻이며 무조건 붙여야한다.
- + : ID를 새로 정의한다는 뜻이며 처음 정의할 때만 붙이고 참조할 때는 붙이지 않는다.
- id : 예약어므로 그대로 사용하며 '/' 뒤에 원하는 이름을 작성한다.
- ID : 고유명칭이므로 View끼리 중복되어서는 안된다.
- @ + id/ ID
- layout_width, layout_height : View의 폭과 높이를 지정할 수 있다.
- 수평, 수직 각 방향에 대해 크기를 지정할 수 있으며 3가지 중 하나의 값을 가진다.
- fill_parent(match_parent) : 부모의 주어진 크기를 다 채운다.
 match_parent는 안드로이드 2.2(API Level 8)부터 추가되었다.
 - wrap_content : 내용물의 크기만큼만 채운다.
- 정수 크기 : 지정한 크기에 맞춘다.
- fill_parent(match_parent) : 부모의 주어진 크기를 다 채운다.
- 수평, 수직 각 방향에 대해 크기를 지정할 수 있으며 3가지 중 하나의 값을 가진다.


- layout_weight : 2개 이상의 Child 요소가 자신이 속한 부모 layout의 공간을 분할해서 차지할 때 비율을 지정할 수 있다.

layout_weight = "0" 일 때의 예제코드
<?xml version="1.0" encoding="utf-8"?><LinearLayout xmlns:android="http://schemas.android.com/apk/res/android" android:orientation="horizontal" android:layout_width="fill_parent" android:layout_height="fill_parent" > <LinearLayout android:layout_width="fill_parent" android:layout_height="fill_parent" android:layout_weight="1" android:background="#123456"> </LinearLayout> <LinearLayout android:layout_width="80dp" android:layout_height="fill_parent" android:layout_weight="0" android:background="#987654"> </LinearLayout> </LinearLayout> |
- 실행화면

- backgroud : View의 배경을 어떻게 채울 것인가를 지정한다.
- #RGB, #ARGB, #RRGGBB, #AARRGGBB 등 4가지 형식
- padding : View와 내용물 간의 간격을 지정한다.
- Padding - 4방향에 동일한 여백이 적용
- PaddingLeft - 왼쪽변에 대해 여백이 적용
- PaddingRight - 오른쪽 변에 대해 여백이 적용
- PaddingTop - 윗쪽변에 대해 여백이 적용
- PaddingBottom - 아랫변에 대해 여백이 적용
- margin : View와 Parent와의 간격을 지정한다.
- layout_marginLeft - View의 왼쪽 여분 공간에 적용
- layout_marginRight - View의 오른쪽 여분 공간에 적용
- layout_marginTop - View의 위쪽 여분 공간에 적용
- layout_marginBottom - View의 아래쪽 여분 공간에 적용


- visibility : View의 표시 유무를 지정한다. 별다른 지정이 없으면 당연히 보이는 것이다.
- visible - 보이는 상태
- invisible - 숨겨진 상태이지만 자리는 차지한다.
- gone - 숨겨지며 자리도 차지하지 않는다.
- gravity, layout_gravity
- gravity: 자기 내부에서 자신의 내용물의 위치를 지정한다.
- layout_gravity : 자신을 담고있는 Parent Layout 내부에서 자기 자신의 위치를 지정한다.
- top : Layout 위쪽으로 배치
- bottom : Layout 아래쪽으로 배치
- left : Layout 왼쪽으로 배치
- right : Layout 오른쪽으로 배치
- center : Layout의 수직/수평 중심에 배치
- fill : Layout의 크기만큼 수직/수평 확대하여 꽉 차게 배치
- 크기(dimension)단위
- px : 실제 1 픽셀 단위
- in : 실제 1 인치 단위
- mm : 실제 1 밀리미터 의미
- pt : points - 일반적으로 폰트 크기에 사용(1/27 inch)
- dp, dip(Device Independent Pixel) : 독립적인 크기를 나타낼 수 있도록 하는 단위
- 표준이 되는 화면 크기를 중심으로 큰 화면에서는 지정된 배율로 크기를 늘려주고, 작은 화면에서는 크기를 줄여준다.
- sp : dp처럼 유동적인 크기이며 주로 폰트 크기에서 사용

3. Layout 종류
3.1 Linear Layout
- 가장 기본적이면서 가장 많이 사용하는 Layout
- 단순히 일렬로 나열하기 위해서 사용한다.
- Layout의 요소들(Child View)을 수직, 수평으로 배치한다.
- android:orientation attribute를 통해 배치 방향이 결정된다.
- android:orientation = "horizontal" : 수평
- android:orientation = "vertical" : 수직


- android:orientation attribute를 통해 배치 방향이 결정된다.
3.2 Relative Layout
- Layout의 요소들간에 위치관계를 부여하고 그 관계에 따라 화면을 구성한다.
- Linear Layout에 비해 각 요소의 위치를 조금 더 세밀하게 조정할 수 있다.
- view들을 서로 겹치게 하거나 정렬 또는 배치 등 다양하게 사용한다.
- Linear Layout처럼 Layout 자체에서 지정해주는 속성은 따로 없으며, Layout 내의 요소들이 가지는 속성에 따라 각 요소의 위치가 결정된다.
- Relative Layout과 요소들 과의 관계를 지정하는 속성
- android:layout_alignParentTop : 해당 요소의 윗선을 parent Layout의 윗선과 일치시킨다.
- android:layout_centerVertical : parent Layout 안에 요소를 왼쪽 중앙에 위치한다.
- android:layout_below : 해당 요소가 이곳에 지정한 ID를 가지는 요소의 바로 아래에 위치한다.
- android:layout_toRightOf : 해당 요소가 이곳에 지정한 ID를 가지는 요소의 바로 오른쪽에 위치한다.
 Parent Layout 내부에서 요소 자신의 위치를 결정하는 속성

상대 Layout/View 기준으로 배치 시 사용하는 속성

Relative Layout 예제 코드
<?xml version="1.0" encoding="utf-8"?><RelativeLayout xmlns:android="http://schemas.android.com/apk/res/android" android:layout_width="fill_parent" android:layout_height="fill_parent" android:orientation="vertical" > <Button android:id="@+id/button1" android:layout_width="wrap_content" android:layout_height="wrap_content" android:text="위쪽 버튼" /> <Button android:id="@+id/button2" android:layout_width="wrap_content" android:layout_height="wrap_content" android:layout_below="@+id/button1" android:text="아래쪽 버튼" > </Button> <TextView android:layout_width="wrap_content" android:layout_height="wrap_content" android:layout_toRightOf="@+id/button1" android:text="중간 텍스트뷰" /> <TextView android:id="@+id/textview2" android:layout_width="wrap_content" android:layout_height="wrap_content" android:layout_below="@+id/button2" android:text="Type here: " /> <EditText android:id="@+id/edittext1" android:layout_width="fill_parent" android:layout_height="wrap_content" android:layout_below="@+id/textview2" /></RelativeLayout> |
- 실행화면

3.3 Frame Layout
- 가장 단순한 Layout
- 각 요소들을 모두 왼쪽 상단을 기준으로 포개는 방식으로 배치된다.
- 위에서 부터 아래로 코딩되었을 때, 아래 코딩된 Layout이 위에 보여진다.
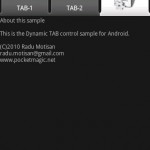
- 두 개의 화면을 붙여놓고 필요에 따라 스위칭 할 때 주로 사용한다. (예, tab)
Frame Layout 예제코드
<?xml version="1.0" encoding="utf-8"?><LinearLayout android:orientation="vertical" android:layout_width="fill_parent" android:layout_height="fill_parent"> <!-- 버튼 --> <LinearLayout android:layout_width="fill_parent" android:layout_height="wrap_content" android:orientation="horizontal" > <!-- 레드 버튼 --> <Button android:id="@+id/frame_layout_example_activity_b_visible_red" android:layout_width="fill_parent" android:layout_height="wrap_content" android:layout_weight="1" android:text="빨간색 레이아웃 보이기" /> <!-- /레드 버튼 --> <!-- 블루 버튼 --> <Button android:id="@+id/frame_layout_example_activity_b_visible_blue" android:layout_width="fill_parent" android:layout_height="wrap_content" android:layout_weight="1" android:text="파란색 레이아웃 보이기" /> <!-- /블루 버튼 --> </LinearLayout> <!-- /버튼 --> <!-- 프레임레이아웃 --> <FrameLayout android:layout_width="fill_parent" android:layout_height="fill_parent" > <!-- 레드 레이아웃 --> <LinearLayout android:id="@+id/frame_layout_example_activity_ll_red" android:layout_width="fill_parent" android:layout_height="fill_parent" android:background="#ff0000" > </LinearLayout> <!-- /레드 레이아웃 --> <!-- 블루 레이아웃 --> <LinearLayout android:id="@+id/frame_layout_example_activity_ll_blue" android:layout_width="fill_parent" android:layout_height="fill_parent" android:background="#000cff" android:visibility="invisible" > <!-- 블루 LinearLayout이 아래에 있어 먼저 보여지므로, 레드 LinearLayout을 먼저 보여주기 위해 invisible --> </LinearLayout> <!-- /블루 레이아웃 --> </FrameLayout> <!-- /프레임레이아웃 --> </LinearLayout> |
버튼 클릭 이벤트(Activity코드)
switch(v.getId()) { // 빨간색버튼 클릭 case R.id.frame_layout_example_activity_b_visible_red: mLlRed.setVisibility(LinearLayout.VISIBLE); mLlBlue.setVisibility(LinearLayout.INVISIBLE); break; // 파란색버튼 클릭 case R.id.frame_layout_example_activity_b_visible_blue: mLlRed.setVisibility(LinearLayout.INVISIBLE); mLlBlue.setVisibility(LinearLayout.VISIBLE); break; } |
- 실행화면

3.4 Table Layout
- 일정한 선에 맞추어 정렬되어야 하는 요소를 정렬할 때 주로 사용한다.
- TableLayout이 전체적인 테이블 구조의 모양을 관리하고, 각 행에는 TableRow가 하나씩 들어가며, 실제 위젯은 각 행의 TableRow안에 들어간다.
Table Layout 예제 소스
<?xml version="1.0" encoding="utf-8"?><TableLayout xmlns:android="http://schemas.android.com/apk/res/android" android:layout_width="fill_parent" android:layout_height="fill_parent"> <TableRow android:layout_width="fill_parent" android:layout_height="wrap_content"> <TextView android:layout_width="wrap_content" android:layout_height="wrap_content" android:text="Text" /> <EditText android:text="EditText" android:id="@+id/EditText01" android:layout_width="wrap_content" android:layout_height="wrap_content" /> </TableRow> <TableRow android:layout_width="fill_parent" android:layout_height="wrap_content"> <Button android:text="Button" android:id="@+id/Button01" android:layout_width="wrap_content" android:layout_height="wrap_content" /> <Button android:text="Button" android:id="@+id/Button02" android:layout_width="wrap_content" android:layout_height="wrap_content" /> </TableRow></TableLayout> |
- 실행화면
